Thursday, January 15, 2015

Alice in Wonderland (costume tutorial)

Let me preface this post briefly by letting you all know that I am currently part of a team working on an Alice in Wonderland themed photo shoot by working on costumes as well as hairstyles. The photo shoot is still a little ways off but once it's completed I will be posting copies of the photos for you all to enjoy/destroy. Critiques are what make us stronger after all.

This post specifically will be dedicated to the costumes I made for this project and will be updated regularly as I make them and edit the photos. I will do my best to tutorial everyone through them but I am by no means an advanced sewer and I am a complete n00b when it comes to writing tutorials so patience is appreciated as are questions when you have them... Work with me people!

So without further ado...


http://images2.wikia.nocookie.net/__cb20100622193920/disney/images/1/1b/Cheshire-cat-6.jpg

The Cheshire Cat (Part One)---


 Step One: Establish a goal
Either buy a pattern or make your own from a garment that is similar to the look you want to achieve


Step Two: Make a pattern/ cut out a pattern


Use the garment and trace the general outline on spare paper I generally use wrapping paper from the dollar store since I can make it as long as I need and it's cheap


 Cut out one for the back panel and one for the side panel


Step Three: Transfer your pattern
 Use a disappearing ink pen, chalk or the like to trace the pattern piece adding approx. 1/2" for seam allowances (as pictured above)


Cut 2 side panels (not on the fold), and folding the back panel pattern in half cut the back panel on the fold as pictured above to ensure it is symmetrical


Step Four: Collar compensation


Measure the "collar" piece on the side panels and cut a similar piece for the back

Step Five: Pull it all together


Sew the collar onto the back panel then pinning along the collar and shoulder as well as from the under arm to the end of the fabric sew your seam.
(Remember not to sew the opening for your arm closed-- sadly I've made this mistake on more than one occasion)

 Step Six: Finishing off the fray


After that is done turn your ends under and stitch them closed to prevent fraying during wear and washing. Typically I use a rolled hem simply because I'm lazy. To do this fold the unfinished edge under the "wrong" side of the fabric (where all your seams show) about 1/4" or less and fold over that a second time about 1/4" and sew along the open edge. This ensures the frayed ends will be trapped inside the fold and provides extra stability as well as a more professional polished look to your finished product.


Bingo-Presto-Done! The finished top... not an replica but I'm quiet pleased with the way it turned out none the less!

Some mistakes I made:

The biggest mistake I made was in my fabric consideration. I used a lightweight cotton when my model piece was made of a lightweight polyester which had more stretch and drape to it.

The second mistake I made was in determining how the collar was made on the model garment. It was not until after I made my cuts that I discovered how it was made. Hindsight being 20/20 and all. 

Ways to prevent making my mistakes:

Decide on your pattern or sample garment prior to purchasing your fabric. Honestly it's simple enough. Purchased patterns will give your fabric considerations on the packet and you can read the garment care label for the type of fabric it is made of in order to make your fabric purchase considerations. Or you can do what I should have and just bring it with you to the store and compare by feel like a naked mole rat!
The latter is fixed in two ways: the first, and easiest, don't be in a rush. In my case, the side panels and the collar were one piece (no seams) and that was attached to the back. The second, use a garment you don't mind taking apart. By removing the seams you get a much clearer picture of how it was put together in the first place. That's reverse engineering for ya!

The Cheshire Cat (Part Two)


Step One: Make your pattern 

 To make your pattern piece for a simple knee length pencil skirt you need 5 measurements: Waist, Hip, Knee, Waist -Hip and Waist to Knee. 

Your natural waist can be found by placing a hand on your side and leaning (like you're going to stretch) to that side... where your side creases is where your waist is. Or if you want to take the fun out of it generally speaking the waist is located 1 inch above the belly button.

Measure the widest point of your hips/bum and your knee measurement is with your legs hip width apart to allow for ease of walking in the skirt when we're finished. Next we need the length measurements from the waist to hip and waist to knee.

After that add a half inch to each of those numbers to give you seam allowance, draw out your measurements (divided by four!) onto spare paper and cut it out like you see above.


Step Two: Transfer the pattern
 The next step is to fold your fabric in half*, trace your outline with chalk and cut 2 on the fold so when you unfold each they will be 1 full panel. This method allows for symmetry and is the most efficient method of fabric usage... again, I'm cheap so waste not, want not.


 Step Three: Waist band (optional)

 I opted for a thicker waistband than my pattern allotted for. It's simple enough to make all you need to know is how wide you want it, and 1/2 of your waist measurement. Double the width so you can fold it in half as pictured. If you'd like to make the skirt reversible cut the band in half.

(make sure you add 1/2" to both width and length measurements)


Step Four: Sandwich time


To attach the waistband you'll need to "sandwich" the three layers. Depending on whether you want the waistband to have the same (matte) texture or opposite (shiny) texture will determine how you stack the layers. In my case I wanted the contrast between shiny and matte (on both sides of the skirt as I intended to make the skirt reversible) so I opted for the matte layer facing up for all three layers.


Step Five: Sewing the Band

Once sufficiently sandwiched pin the waistband to one of the skirt panels, sew with 1/4" seam allowance and make sure you use a serger or any stretch stitch (as pictured to the right) this allows for ease of movement in the skirt without putting too much strain on the seams. Be sure to repeat the process for the other skirt panel.
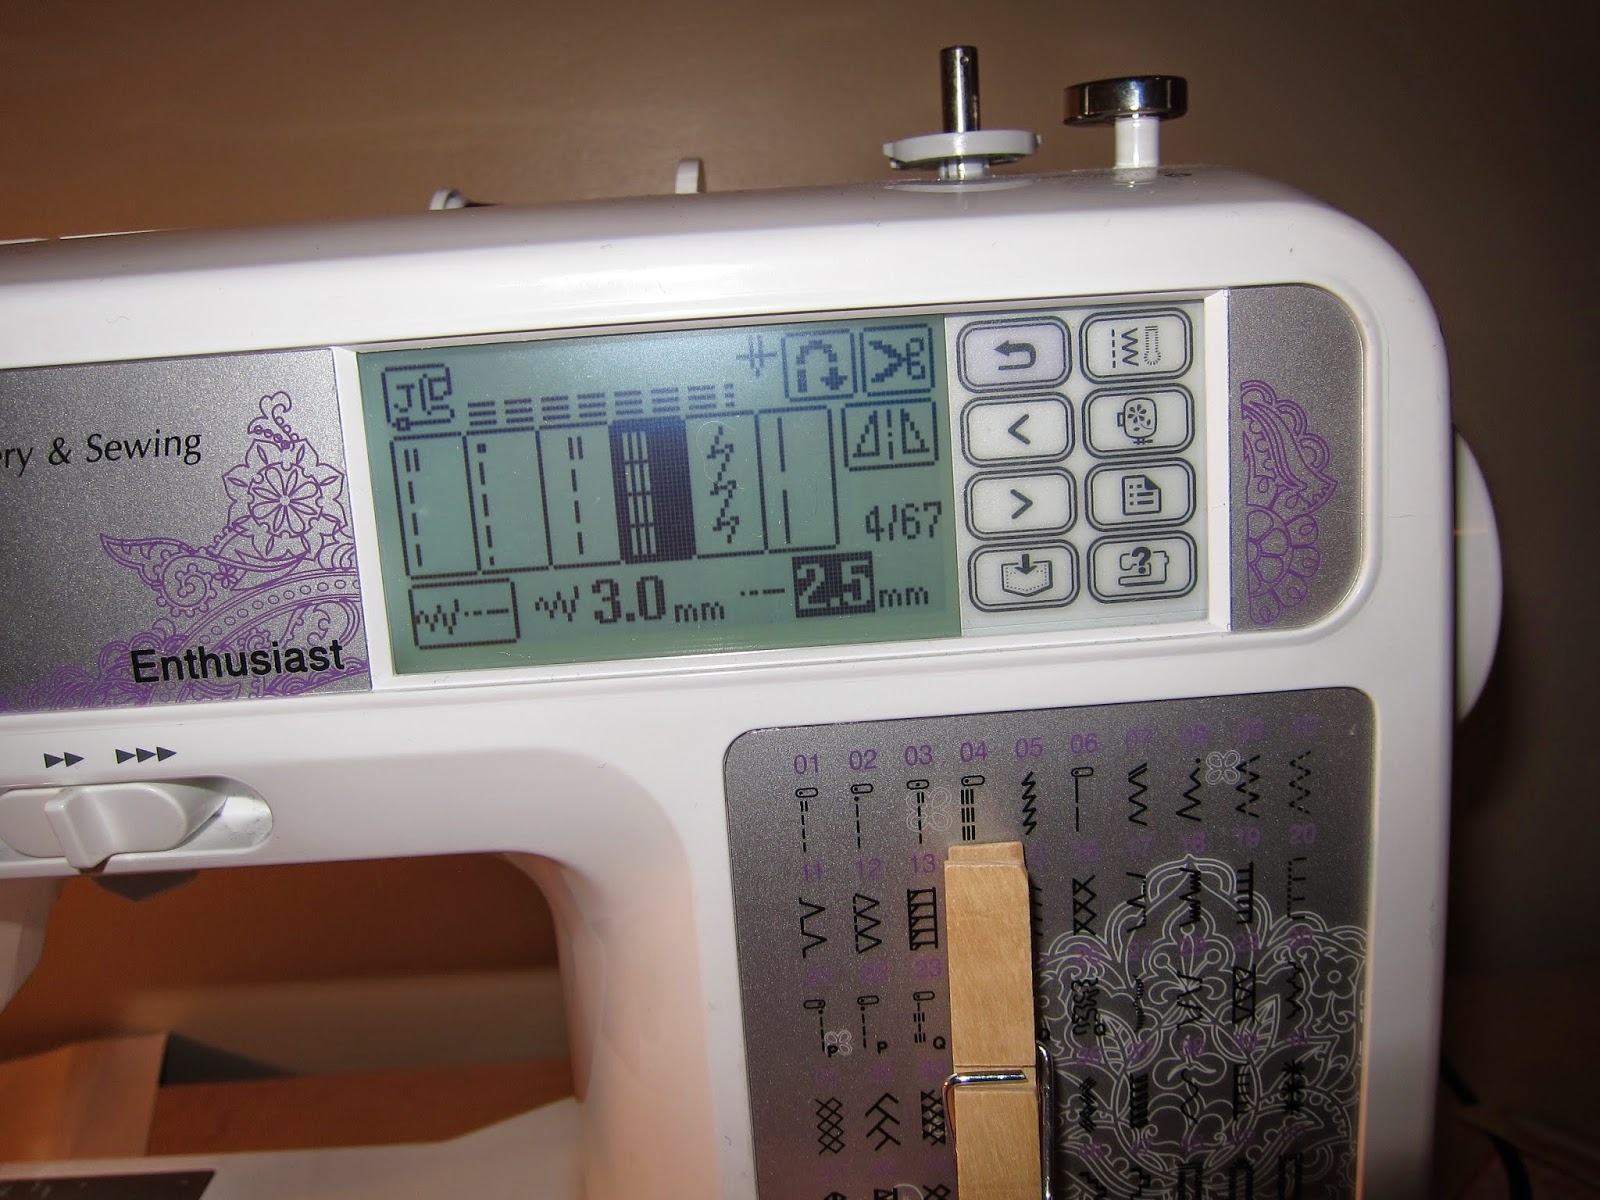
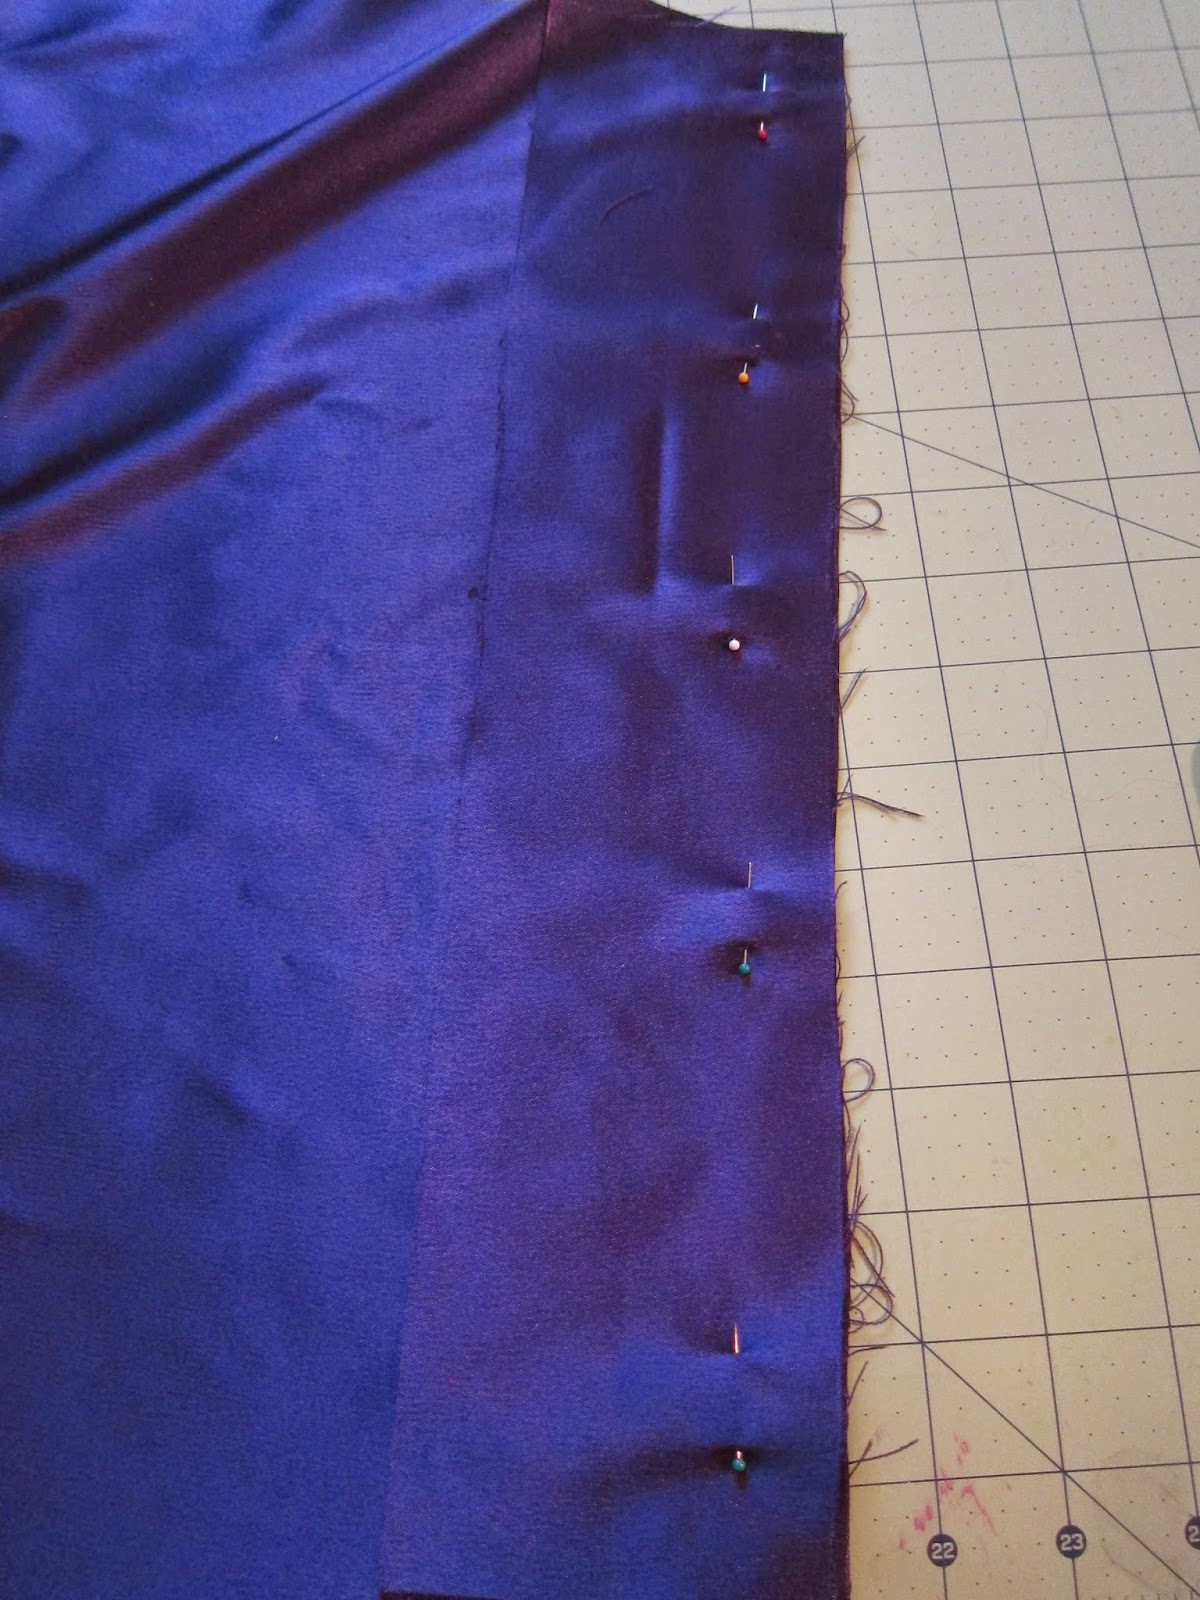
**To prevent a lot of frustration please, please, please make sure to change your needle to a stretch needle (generally 75/11 or 90/14) and they can be bought very inexpensively at most fabric stores. Using this needle will prevent torn fabric, tangled bobbins, as well as ranting, raving and copious amounts of cursing.... or so I've been told. >,>

Step Six:  Sew skirt panels/ Attach your zipper (optional)
Ok guys I have something to confess... I didn't take any pictures of this step. I followed this tutorial here.

Originally my plan was to make this skirt reversible but as the skirt progressed I realized the stretch of the fabric was not going to be sufficient enough to clear my models lovely curves so a zipper was inevitable. To make the skirt reversible place the two panels together sew with 1/2" seam allowance and sew with a straight stretch stitch along both sides of the skirt. To "hide" the seam do a rolled hem.

 Step Seven: Finishing touches

To ensure a polished finish make sure all loose threads are hemmed away neatly and make sure to hem the bottom of the skirt again using a rolled hem with the straight stretch function on your sewing machine to prevent fraying while allowing for ease of movement in your seams.

Inevitably when garments are intended to be "fitted" there will always be a need for adjustments. In my case the skirt was a bit too loose (below the hip) for the look we were going for so I took it in about 1/3" on each side.


The Completed Skirt:
Finished Front (Left) & Side (Right)


The Completed Outfit


 All that's left is the lavender undershirt (which is generally cheaper to buy), a cute kitty eared head band, some fashionable heels and a gorgeous model with some fabulously flashy makeup.

 So, what do you think? I hope you find this in some small way helpful and inspiring. I'd love to see pictures of your Cheshire cat cosplay, feel free to share your photos in the comments below!


Sunday, January 11, 2015

2015 McGreat Awards


Last night several instructors and administrative staff members of my school, Miller-Motte College, as well as myself and one other student were invited as guests to attend the McGreat Awards Ceremony held in Wilmington, NC. It was a lovely event and really showed just how much they appreciate their employees and the effort they put forth everyday. Below are just a few photos of the event and award categories!


Our small attending group
(From Left to Right: Mrs. Altheia, Mrs. Robinson, Mrs. Summer, Mrs. Val, Jennifer Ryder)


Cocktail hour included decorative cider flutes, hamburgers, parm-garlic steak fries and a nice little fruit and cookie table!


 After the cocktail hour we were ushered into our reserved seats with some movie going snacks: fresh popped popcorn, a chocolate bar and a bottle of water all were greatly appreciated I assure you ;)


And then the nights real mission got underway!


As with any awards show there are multiple categories in which to win an award and here are just a few of the categories Great Clips put forth this year. Each award recipient received a trophy and took a picture of the company's CEO who was amazing enough to not only attend but to hand each stylist, manager and salon their award, take a photo with them and pass on a few words of congratulation and encouragement.


I thought a couple of their mission award categories were particularly notable as it shows that numbers aren't the only thing this company cares about in their stylists.


 "Now comes the part of the award ceremony where things tend to slow down a bit so to keep the energy going we're going to try to liven things up", said one of our two hosts for the evening.


 A mini competition ensued; the entire salon would come up to accept the award to their own personal song in any sort of fanfare they desired. The winner, the most entertaining entourage, would receive a pizza party but we all know the winners were the audience.


All in all it was a fun night and not only did I enjoy myself I learned quite a bit about the company's "mission" and not only it's philosophies but it's acts about and on behalf of its employees and I would tell anyone who asked me about them as a perspective employer to absolutely look into them solely based on what I saw last night.


P.S. On a completely unrelated note....


I found the most dapper gentleman at the awards and had to get his picture. It wasn't until after the event when I showed this photo to an instructor, who is more familiar with geeky things, pointed out that his outfit almost befitting of The Doctor that I realized just why I liked him so much. ^_^ 
Many thanks to this gentleman for being so accommodating and allowing me to take his photo!


And for the curious...

My outfit for the night included a high-waisted black velvet floor length skirt I had made myself two nights prior, a blouse and a few trinkets I had laying around the house. Not too shabby for only having three days notice!

Monday, January 5, 2015

A(ph)ogee protein treatment- Step by Step & Review


Ends Before Treatment
Hair Before treatment
(No Flat Iron)
Let's start at the beginning.... I have recently undergone a hair transformation. I went from a natural level 3 (near black kinda brown) to a level 9 (blonde but not the palest blonde) in two back to back double processes. Needless to say my hair is in need of some repair. Enter: A(ph)ogee a protein treatment. So I have heard tale of how "amazing" this Aphogee stuff is for weakened hair and for $3.79 at Sally's I figured why not give it a shot!


Step One: Shampoo hair and towel blot
Check.


Step Two: Apply "step one" until hair is well saturated paying particular attention to the ends.

Comb through with a wide tooth comb to distribute while hair is wet only!
(Fair warning this stuff does not smell pleasant in any sense of the word but it's not a dangerous chemical so no ventilation is required)


Step Three: Blow-dry with no tension. Do not comb at this point as the protein mixture creates a "crust" around the hair shaft and will break if you apply tension.


(Honestly mine felt like it would get up and walk off on it's own that's how stiff it was!)


Step Four: Re-wet and then rinse with warm water removing all dried protein before towel blotting and applying "step two" (the balancing moisturizer) leaving it on the hair for 2 minutes before rinsing out.

Step Five: Dry and style as usual.


 (Left) My usual products (a leave-in, some oil and heat protectant)


(Right) Results after the blow dry with medium tension
(Meh)
(Left) My ends after the blow dry
( not that great, huh?) 


(Right) After Flat Iron


Pink-ish spot I found in my hair after treatment

Thoughts:

Honestly, I did not like the Aphogee... I think my Moroccan oil mask does so much more for my hair (moisture and texture wise) and with how little the Aphogee did for my breakage issue it just isn't worth it for me to do again. Not only did Aphogee not help my breakage issue it also stripped my color made my ends appear even more frazzled than before and I noticed a pink spot in my hair that was not there prior to the treatment. 
Will I say that this product doesn't work and that nobody should ever use it? No. It didn't work for me and what exists on my hair currently. I would hesitate to suggest it to people who have lightened hair or those who have fashion colors simply due to the reduced overall appearance of color (and in my case altered color in some areas). 

In my opinion: save your money. Get the Moroccan Oil hair mask, 10,000mcg Biotin, a regular trim and a semi-permanent clear color... then leave the rest to nature.

Have you tried A(ph)ogee before? Share your thoughts/ experiences in the comments below!


Sunday, January 4, 2015

Shinobi Clans - A Ninja Card Game

With the expansion of interactive media and the ease of access, varied playability, and essentially unrestricted time dedication it provides it's no wonder that so many of our younger generations are just plain bored when they hear the words, "Let's play a board game".  Shinobi, and games like it, just may be the key to bringing games (and friends) back to the table. 


I bought this card game on a whim from Amazon for less than $20 for a gift for my husband and have not regretted it one bit! It is quite simple to play and follow, is perfect for 4 players (3-5 players suggested), the artwork is just plain gorgeous and the play time is a comfortable 45-60 minutes!

Workup Phase:
To begin shuffle your play deck, the contract reward and target cards separately. Then choose three random cards from the target cards and draw three random cards from the contract reward cards. This gives each target its value for either being assassinated or protected. The values are found by adding the numbers, in the ryō*, on the bottom right for the assassins reward and the bottom left denotes both the reward for the protector as well as the additional protection bonus that gets added to the protectors damage count against the assassins. 

Taking Contracts:
Next, take the contract coins each player was given and take out the red (assassinate) and blue (protect) contract coins that correspond with the target cards laid out from the step above. As the backs of these coins are random in color and will not give away your choices. At this time you decide whether to assassinate or protect only two of the three targets and place those coins face down in front of you. 
Tip- keep the values of the targets in mind when making your contract decision. 
For example: the Shogun is worth 9 ryō* (gold) if assassinated however one would need to    overcome the the five defense it poses in addition to whatever defense another player may contribute. You have a choice... defend somewhat easily for less gold or go all out for a larger pot, remember the one with the most gold wins!


Drafting Phase:
Next (for the first round) deal each player four cards for their hand and then an additional six cards for the drafting phase. The drafting phase is simple: take one card and pass it around until all of the cards have been chosen. For the second round each player is dealt 2 cards and an additional 8 for drafting (extra cards must be discarded at the end of the drafting phase) and for the third, and final, round no cards are dealt to the players hand instead all 10 cards are drafted. 
Tip- Keep your contracts in mind when selecting your draft cards. You have many options aside from simply picking the cards most suited towards your goal. 
For example: sabotage your friends! Select the cards you would not like to oppose you in battle and discard them on a target that you do not have a contract with! This way it doesn't hurt you and it forces an opponent to fortify their position giving your true contracts a higher chance of success! 

 Specialty Cards:

There are a variety of cards aside from assassins, protectors and weapons there are specialists, events and meddlers. 

Event cards allow you to draw additional cards which may or may not be advantageous.


Meddlers are cards that alter the contract values. These are especially useful to mess with opponents!


Specialists are cards played face down (unless otherwise noted) on the target card. Each, as the name implies, has a special ability. There are bomb makers, poisoners, scouts and spies. Some will "kill" the cards near it others will reveal what opponents contract intentions are to give you an edge.
 

Playing Phase:
The playing phase was probably the most confusing part until we gave up and dove in. K.I.S.S. method very much applies here. Each player lays down one card during their turn face down unless it is an event or a specialist card that designates it to be played face up (card types to be explained soon). All specialist, assassin or protector cards are lined up face down on top of the intended target to be played in reverse order after the completion of the playing phase. All weapons cards are to be played on the corresponding side (left- defend, right-kill) and the assassins/ protectors are played on top of the weapon cards adding to their attack/defense values. The playing phase ends when all cards have been played or all players have 'passed' on their turn. Once you have 'passed' you may no longer play cards in this round.
Tip- Be careful not to place a weapon too soon into the round as it will tip off your opponents as to your contracted intentions, unless you are attempting to throw them off with a bluff.

Resolving the Battle:
With the last card played (or all players having passed) the playing phase is over and you can begin to "resolve" the contracts. As I mentioned earlier the cards are played in reverse order so the card at the top of the pile is the placed on the weapon closest to the target card on the corresponding side (again left-save me/ right- die, die, die). You'll note two cards in the upper right one was a specialist card which removed another card from battle and again I'll go into more details about those soon. The winner for each contract is determined by simple math. 
For the assassins: add the attack values (denoted on the bottom right) for both the assassins and the weapons below them taking unique card wordings into account. For example: one card may say that it's value is double that of the opponents card in the same slot. Meaning if it is the first card on the protector's side it's defensive value is 2x the first assassin card.

For the protectors: add the defensive values the same as the assassins and add the targets personal defensive value to that score.

Compare the two in this case Protectors: 17  Assassins: 6 The player(s) who selected to protect the Shogun split the contract reward rounding up. Resolve the remaining two targets the same way and continue rounds two and three. The Shinobi Clan (player) with the most ryō at the end wins!

TL;DR: You are ninja. Choose your contracts well. Assassinate or protect your target through either strength or cunning and win the ryō! It's immensely fun, the artwork is amazing and since most of the cards are hidden until the resolution phase there's very little time for sore losers to complain before shuffling out the next drafting hand! If you're looking for a fun, simple, cognitive game to play with a few friends I highly recommend Shinobi Clans!
 
I hope you enjoyed this play through even 1/10th as much as I enjoyed playing the game.  Good luck fellow ninjas.... live long and prosper!

 **Fun Fact!: Ryō was a form of currency in Feudal Era Japan converted from the Chinese equivalent tael a unit of measurement. Local daimyo's would mint the coins each with their own mark so everyone would know where the money came from, and one ryō was equal to 4 koku (an amount of rice). One koku was said to be enough rice to feed one person for one full year roughly 330lbs/ 150 kilos! 

No wonder the one with the most ryō wins... based off of one contract alone I won't have to worry about rice for years to come!